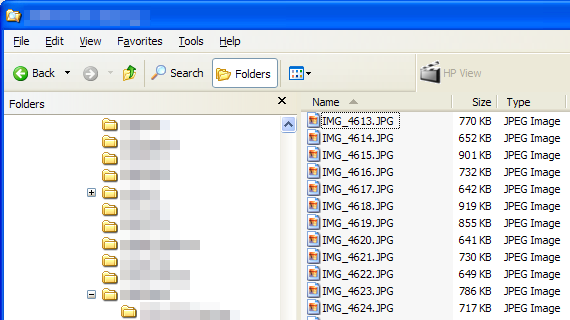
 Step 2.
Find the photos you plan to burn to the CD.
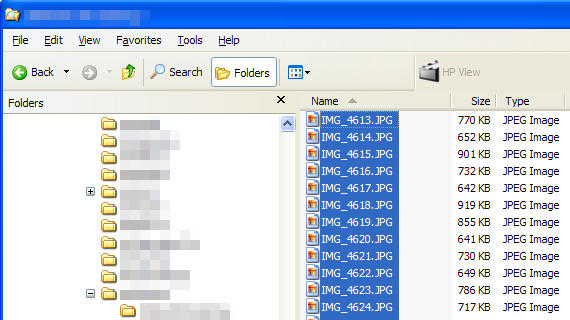
Step 2.
Find the photos you plan to burn to the CD.
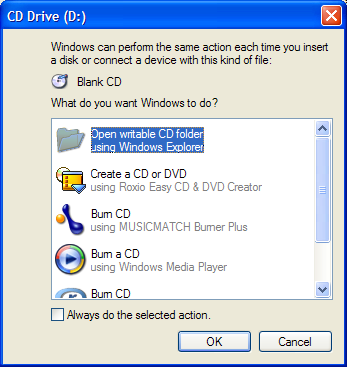
 Step 3.
Insert a blank CD into your CD-burning drive. A window should pop up to ask how to open the CD. Choose "Open Writable CD Folder Using Windows Explorer".
Step 3.
Insert a blank CD into your CD-burning drive. A window should pop up to ask how to open the CD. Choose "Open Writable CD Folder Using Windows Explorer".
 Step 4.
You should now have two windows open: The one where you have the pictures you want to burn, and the one with the writable CD folder. Click and drag the names of the photos you want to copy over to the writable CD folder.
Step 4.
You should now have two windows open: The one where you have the pictures you want to burn, and the one with the writable CD folder. Click and drag the names of the photos you want to copy over to the writable CD folder.
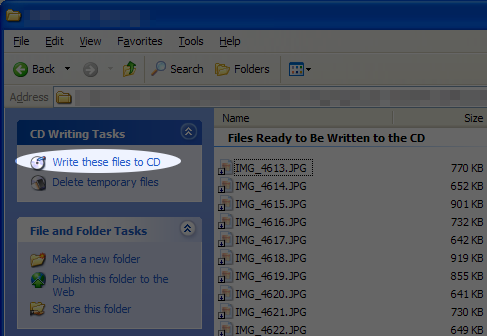
 Step 5.
Once you're done clicking and dragging the files you want to copy over to the writable CD folder, click "Write these files to CD".
Step 5.
Once you're done clicking and dragging the files you want to copy over to the writable CD folder, click "Write these files to CD".
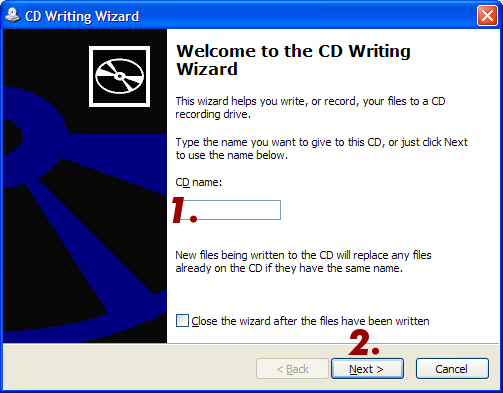
 Step 6.
Name the CD then click "Next".
Step 6.
Name the CD then click "Next".
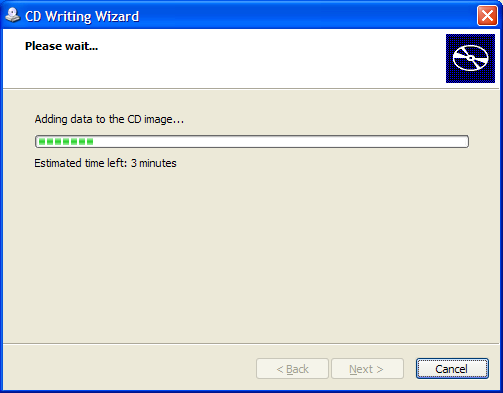
 Step 7.
Wait for the CD writer to finish burning the image to the new CD.
Step 7.
Wait for the CD writer to finish burning the image to the new CD.
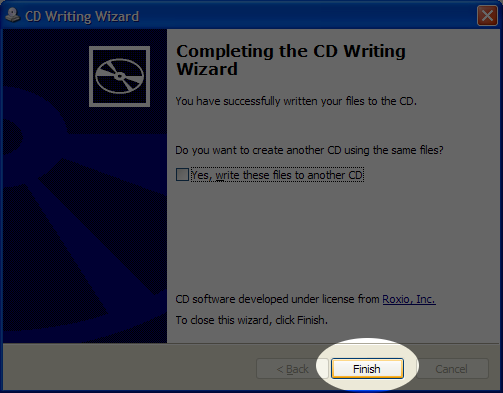
 Step 8.
When the "Completed the CD Writing Wizard" window pops up, click "Finish". Your computer will probably pop the CD out automatically.
Step 8.
When the "Completed the CD Writing Wizard" window pops up, click "Finish". Your computer will probably pop the CD out automatically.
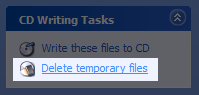
 Step 9.
If the CD writing directory is still open, click "Delete temporary files". If you don't see this option, don't worry about it.
Step 9.
If the CD writing directory is still open, click "Delete temporary files". If you don't see this option, don't worry about it.