Currently, remittances to non-residents are allowed by banks if the person making the remittance furnishes an undertaking, accompanied by a certificate from a Chartered Accountant ("CA") certifying the rate for withholding tax as per section 195 of the Act. The banks then forward the certificates to the Reserve Bank of India ("RBI"), which in-turn forwards it to the Income tax department.
Finance Act, 2008 inserted a new sub section (6) to section 195 effective from April 1, 2008, which requires the person responsible for making payment to a non-resident to furnish information relating to such payments in forms to be prescribed. The Central Board of Direct Taxes ("CBDT") has now, by notification No 30/2009 dated March 25, 2009, prescribed a new rule 37BB in the Income Tax Rules, 1962 ("the rules") prescribing Form 15CA and Form 15CB to be filed in relation to remittances to non-residents under section 195(6) of the Income Tax Act, 1961 ("the Act"). This new rule is effective from July 1, 2009 and shall apply to all remittances being made after July 1, 2009. The process that will have to be followed, before any remittance can be made, is as under—
Step 1 : Obtain a certificate from a Chartered Accountant in Form No 15CB
Step 2:Furnish the information in Form No15CA
Step 3:Electronically upload Form 15CA on the designated website
Step 4:Take Print out of Form 15CA and file a signed copy
Step 5:Remit money to the Non Resident
Please note that all the above steps have to be undertaken before remittance of money to the non-resident.
Notification no. 30/2009 is as below:-
In exercise of the powers conferred by section 295 read with sub-section (6) of section 195 of the Income-tax Act, 1961, the Central Board of Direct Taxes hereby makes the following rules further to amend the Income-tax Rules, 1962, namely:-
1. (1) These rules may be called the Income-tax (Seventh Amendment) Rules, 2009.
(2) They shall come into force with effect from 1st July, 2009.
2. In the Income-tax Rules, 1962, after rule 37BA, the following rule shall be inserted, namely:-
"Furnishing of information under sub-section (6) of section 195.
37BB. (1) The information under sub-section (6) of section 195 shall be furnished by the person responsible for making the payment to a non-resident, not being a company, or to a foreign company, after obtaining a certificate from an accountant as defined in the Explanation to section 288 of the Income-tax Act, 1961.
(2) The information to be furnished under sub-section (6) of section 195 shall be in Form No. 15CA and shall be verified in the manner indicated therein and the certificate from an accountant referred to in sub-rule (1) shall be obtained in Form No. 15CB.
(3) The information in Form No. 15CA shall be furnished electronically to the website designated by the Income-tax Department and thereafter signed printout of the said form shall be submitted prior to remitting the payment.
(4) The Director-General of Income-tax (Systems) shall specify the procedures, formats and standards for ensuring secure capture, transmission of data and shall also be responsible for the day-to-day administration in relation to furnishing the information in the manner specified.
FORM NO. 15CA- Download
FORM NO. 15CB- Download
http://taxguru.in/income-tax/new-form-15ca-15cb-for-information-to-be-furnished-under-sub-section-6-of-section-195-of-the-income-tax-act-1961-relating-to-remittance-of-payments-to-a-non-resident-or-to-a-foreign-company-ca.html
 Step 2.
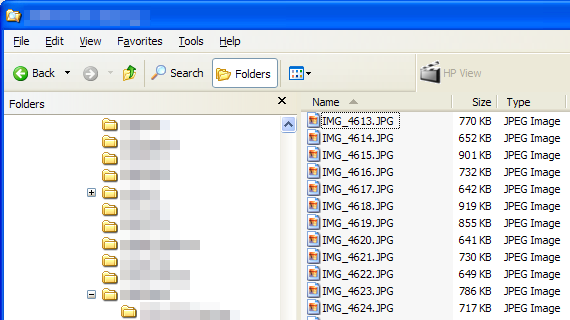
Find the photos you plan to burn to the CD.
Step 2.
Find the photos you plan to burn to the CD.
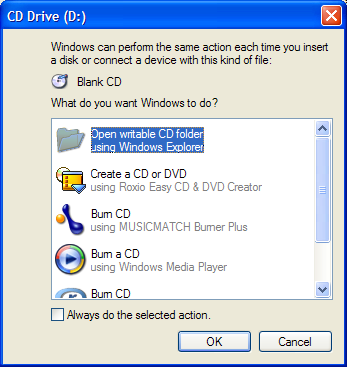
 Step 3.
Insert a blank CD into your CD-burning drive. A window should pop up to ask how to open the CD. Choose "Open Writable CD Folder Using Windows Explorer".
Step 3.
Insert a blank CD into your CD-burning drive. A window should pop up to ask how to open the CD. Choose "Open Writable CD Folder Using Windows Explorer".
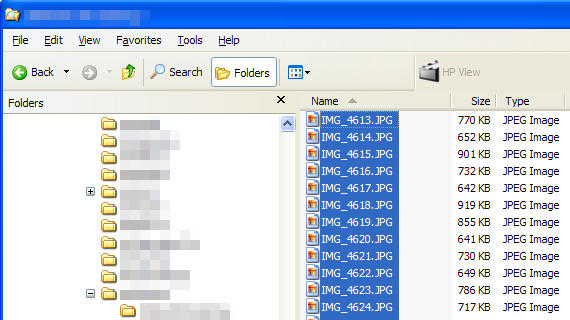
 Step 4.
You should now have two windows open: The one where you have the pictures you want to burn, and the one with the writable CD folder. Click and drag the names of the photos you want to copy over to the writable CD folder.
Step 4.
You should now have two windows open: The one where you have the pictures you want to burn, and the one with the writable CD folder. Click and drag the names of the photos you want to copy over to the writable CD folder.
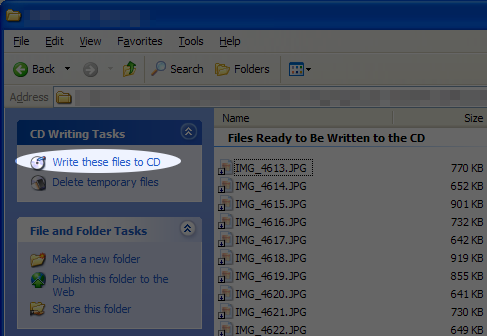
 Step 5.
Once you're done clicking and dragging the files you want to copy over to the writable CD folder, click "Write these files to CD".
Step 5.
Once you're done clicking and dragging the files you want to copy over to the writable CD folder, click "Write these files to CD".
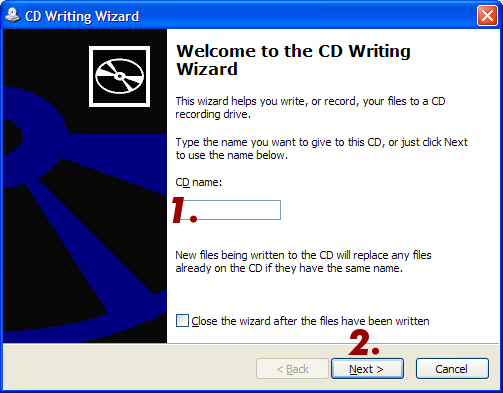
 Step 6.
Name the CD then click "Next".
Step 6.
Name the CD then click "Next".
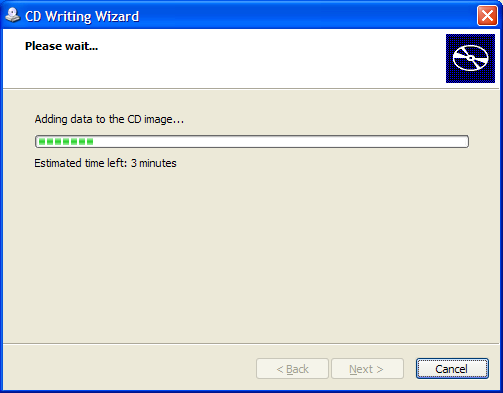
 Step 7.
Wait for the CD writer to finish burning the image to the new CD.
Step 7.
Wait for the CD writer to finish burning the image to the new CD.
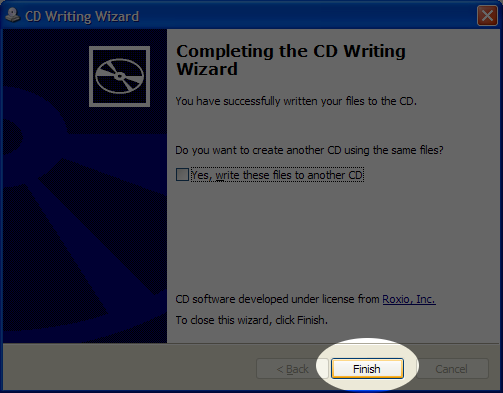
 Step 8.
When the "Completed the CD Writing Wizard" window pops up, click "Finish". Your computer will probably pop the CD out automatically.
Step 8.
When the "Completed the CD Writing Wizard" window pops up, click "Finish". Your computer will probably pop the CD out automatically.
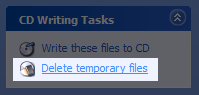
 Step 9.
If the CD writing directory is still open, click "Delete temporary files". If you don't see this option, don't worry about it.
Step 9.
If the CD writing directory is still open, click "Delete temporary files". If you don't see this option, don't worry about it.


![clip_image002[1]](http://mscoder.files.wordpress.com/2010/07/clip_image00211.jpg "clip_image002[1]")

